The Hidden Errors in Drone Assembly

Drone assembly feature image
01

Identify Error-Prone Areas

Pinpointing the areas most susceptible to errors is the foundation for a successful error-proofing strategy.

  • Conduct a Production Audit
    Begin by analyzing production data, quality control reports, and incident logs to identify recurring issues. Are there specific steps or stations where defects frequently occur? Focus on both human and machine-related errors.
  • Involve Frontline Workers
    Your factory workers are often the first to detect potential problems. Encourage them to share insights about where and why errors happen. Their feedback can reveal valuable information that might not be captured in data alone.
  • Use Root Cause Analysis (RCA)
    Addressing the surface issue isn’t enough. Use tools like 5 Whys or Fishbone diagrams to trace errors back to their origin. This ensures that you’re solving the root causes of mistakes, not just treating the symptoms.
  • Identify High-Risk Processes
    Prioritize error-proofing efforts in processes or stations where errors are both frequent and costly. In industries like aerospace or medical device manufacturing, even small mistakes can have severe consequences, making these areas critical candidates for error-proofing.
02

Choose the Right Tools for Your Needs

Once you’ve identified the most error-prone areas in your process, it’s time to select the right error-proofing tools and technologies that can help address those specific issues. It’s important to remember that there’s no one-size-fits-all solution, as different processes and error types require different tools.

  • Evaluate Existing Solutions
    Review the tools already in place. Are manual checks being used where automation could improve accuracy? Are physical poka-yoke devices still effective, or are they outdated?
  • Consider the Nature of Errors
    • For human errors: If your issues stem from human mistakes (e.g., incorrect assembly or missing parts), consider digital solutions like real-time visual prompts, guided instructions, or automated feedback systems that alert workers when errors occur.
    • For machine-related errors: If machines are responsible for frequent errors, automated quality checks and real-time equipment monitoring can prevent downtime and ensure consistency.
  • Decide on Digital or Physical Error-Proofing
    Traditional error-proofing methods rely on mechanical devices like jigs or limit switches. While effective, these tools are reactive. Modern error-proofing systems provide digital solutions that are more flexible and scalable. For instance, PICO’s real-time monitoring and error-detection software helps you respond to shop floor issues faster and make quicker decisions, enabling manufacturers to adapt effectively to changing conditions.
03

Pilot the Process on a Small Scale

Before rolling out your error-proofing solution across the entire production line, it’s best to pilot it in a controlled environment. A pilot allows you to test the effectiveness of your tools, make necessary adjustments, and build confidence before full-scale implementation.

  • Select a Pilot Area
    Choose a station, line, or product to test your error-proofing tools. Ideally, this should be an area that experiences frequent or costly errors, based on the findings from Step 1.
  • Set Clear Objectives
    Establish measurable goals for the pilot. For example, you might aim to reduce defects by a specific percentage or minimize rework time. Defining these metrics upfront will help you evaluate the success of the pilot and guide future rollouts.
  • Monitor Performance Closely
    During the pilot, track error rates, production efficiency, and worker feedback to gauge how well the tools are functioning. Take note of any issues or challenges that arise, as these can inform improvements in broader implementation.
  • Be Open to Iteration
    Piloting is an iterative process. Expect to discover areas for improvement, and be ready to adjust your system based on feedback. This phase allows you to refine the approach, ensuring maximum effectiveness during full-scale rollout.
04

Train and Support Your Team

Technology alone can’t drive error-proofing, your team’s understanding and buy-in are equally important. Proper training and ongoing support are crucial for success.

  • Design Hands-On Training
    Provide hands-on training to your workers. For instance, if you’re implementing PICO’s real-time error detection system, ensure employees practice using digital prompts and alerts in their day-to-day tasks.
  • Provide Continuous Learning Resources
    Equip workers with digital resources like video tutorials, interactive guides, and quick-reference materials to reinforce training. Modern error-proofing systems like PICO offer real-time prompts and instructions, making it easier for workers to adapt.
  • Encourage Ownership and Accountability
    Employees are more likely to engage with error-proofing initiatives when they feel a sense of ownership. Encourage them to identify potential errors in their processes and suggest improvements. Establishing a feedback loop where workers can share their experiences ensures continuous improvement.
  • Support Cross-Functional Training
    Cross-functional training builds a more resilient workforce. When employees understand the full production process, they’re better equipped to spot errors before they occur.
05

Monitor and Optimize the System Continuously

Error-proofing isn’t a set-it-and-forget-it solution. Continuous monitoring and optimization are key to long-term success.

  • Use Data to Drive Improvements
    Modern error-proofing systems like PICO’s provide real-time data on production efficiency and error trends. Use these insights to make data-driven decisions about where further improvements are needed.
  • Regularly Audit Error Rates
    Conduct regular audits to track error rates, defect occurrences, and rework data. Are certain errors still slipping through? Are there areas where performance has improved dramatically? Use this data to tweak your systems for optimal performance.
  • Adapt to Changing Conditions
    Manufacturing environments are constantly evolving. Whether it’s new equipment, changing product lines, or shifts in workforce dynamics, your error-proofing tools should be flexible enough to adapt..
  • Solicit Continuous Feedback
    Encourage workers and managers to offer ongoing feedback about how error-proofing tools are functioning. Are there frustrations or gaps that need to be addressed? Continuous feedback is essential to evolving your system as conditions change.
  • Benchmark Your Progress
    Compare performance data before and after error-proofing implementation to measure improvement. Benchmarking your progress not only demonstrates the ROI of your investment but also ensures ongoing refinement of your systems.

The drone assembly process is riddled with opportunities for small errors to lead to massive failures. One missed torque spec or reversed wire can ground your product. Instead of just talking about it, we tore a production-grade consumer drone down to its core and rebuilt it using digital work instructions and smart connected tools. Every fastener, wire, sensor, and subassembly was put back together using the same error-proofing methods we help aerospace manufacturers deploy on their own lines.


The drone we disassembled weighed just under 900 grams and packed a 3-axis gimbal, multiple obstacle sensors, foldable arms, and a battery capable of 45+ minutes of flight. Every cubic centimeter was dense with electronics, and every step of reassembly required precision; correct torque on arm mounts, perfect routing of ribbon cables, and flawless sensor alignment.


Key characteristics of the consumer drone:

  • Takeoff weight: 859g
  • Max flight time: Up to 46 minutes
  • Foldable arm architecture
  • 3-axis gimbal with hasselblad camera
  • Omnidirectional obstacle sensing
  • Modular subassemblies


Drone assembly on a workbench, using Pico MES as worker guidance

The teardown of the consumer drone, fully disassembled and ready to be built again. Tools used include fastening tools by ASG-Jergens and Kolver; barcode scanners and printers by Zebra, and ASUS monitors display PICO's worker guidance. 

What Are Some Common Challenges with Drone Assembly?

Here are some of the challenges we ran into during the drone assembly process: 

Challenges

Why it Happens

Real World Impact

Torque control for drone assembly

Manual click wrenches and spreadsheets miss trends

 Loose props or arm screws → mid-air break-ups
Drone assembly wiring

Dozens of similar connectors, polarity risks

Reversed sensor power → in-flight blindness

High-mix variants

Custom payloads & frame kits

Operators skip or reorder steps, rework skyrockets

Late-stage rework

Errors surface only at flight test

Extra test hours, missed ship dates

Mechanical failure is blamed for roughly 22% of drone crashes; this includes equipment failure, such as a turbocharger or a propeller. According to Anvil Labs, human error contributes to 80–90 % of all UAV incidents. The good news: Both numbers plummet when poka-yoke methods are implemented to prevent common mistakes in manufacturing from happening.

How Does PICO Error-Proof Drone Assembly?

1. Digital Work Instructions Built for High-Mix Variants

  • Variant logic: One master recipe, automatic branching for payload A vs B
  • Rich media: View colorful images, videos, and PDFs directly in the software
  • Clear operator guidance: Interactive worker guidance expedites the learning process for new hires                to become productive, quickly; also advances with more seasoned operators

PICO digital work instructions for drone assembly

PICO makes it easy to create interactive, easy-to-follow digital work instructions for drone assembly operations. Digital worker guidance consists of step-by-step text instructions, supporting images or videos, annotations, linked content, and more.

2. Digital Traceability

Every drone you build carries risk, and if something goes wrong post-deployment, the first question is: Can you prove what happened at every step?

With PICO, every tool reading, component scan, torque validation, and operator sign-off is logged automatically, meaning no manual checklists or binders. You get a full digital birth certificate for each unit, down to the serial number. When regulators, auditors, or customers ask for documentation, whether for FAA compliance or ISO 9001, you can export exactly what they need in seconds. Learn more about how aerospace manufacturers use traceability software for quality. 


3. Real Time Error-Proofing for Accuracy

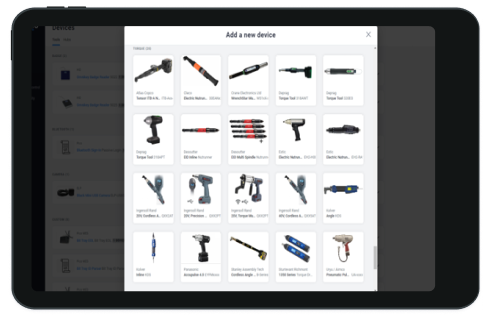
These are examples of real-time validations that PICO can provide by integrating with over 200 different types of devices and smart IOT tools:

Torque/ Fastening Tools

Ensure every motor-mount screw hits 0.68 N·m ± 3 %

Barcode Scanner

Confirm that the correct battery pack SKU and Electronic Speed Controller (ESC) are compatible

Vision Cameras

Real-time detection of non-obvious defects and anomalies

Multimeter

Confirm proper voltage before sealing enclosures

Fast Implementation, ROI On Day One

PICO deploys fast, starting with a single station and scaling at your pace. There’s no custom development or waiting months to see value. Your existing torque tools, multimeters, barcode scanners, and smart cameras plug right in. PICO is SOC2 compliant and adheres to ITAR regulations, ensuring stringent data security and privacy. Your data lives securely behind your firewall. When you're building the future of flight, your software shouldn’t slow you down or put your data at risk. Here are some examples of results that drone manufacturers experience after implementing a modular MES that error-proofs: 


  • Reduced rework: Teams report zero torque-related re-tests after week 1
  • On-time deliveries: Catch-and-halt reduces schedule slips linked to late-stage failures
  • Improvement in engineering bandwidth: Less time firefighting on the line
  • Audit ready: Every fastening, scan, and measurement tied to the unit’s serial number

You're building something new, so why bring old problems with you?

Most drone manufacturers today aren’t tied to decades of tech debt. You’re starting fresh, with clean facilities, agile teams, and a chance to build it right from day one. So ask yourself: If you’re setting up a new factory, would you really copy the same paper-based processes and bloated systems from your last job? Or would you choose tools that are built for speed, precision, and modern manufacturing from the start?


PICO gives you the control, visibility, and flexibility you need, without the legacy baggage. Start smart, scale fast, and don’t let old habits fly your factory into the ground.

FAQs About Drone Assembly and Error Proofing

1. What are the most common drone assembly mistakes that lead to flight failure?

The top causes we see include:

  • Under- or over-torqued motor mount screws, which can loosen mid-flight and cause arm detachment
  • Reversed polarity on power connectors, especially on ESCs and flight controllers
  • Incorrect payload integration, like mismatching a camera module with the wrong gimbal mount
  • Skipping steps for certain drone variants, due to confusing paper work instructions

These mistakes aren’t due to lack of skill—they’re due to lack of reliable, error-proofed processes.


2. How do digital work instructions solve real-world drone build issues?

Drone builds often include multiple configurations: different sensors, flight controllers, payloads, and frame sizes. The operator can choose the specific work instructions for each variant.

For example:

  • If you're building Payload B, the instructions automatically include steps for that camera mount and omit the steps for Payload A.
  • Inline photos and videos show exactly where to route wiring harnesses to avoid EMI.
  • Instructions pause if a required component scan or torque validation hasn't occurred, eliminating skipped steps.


3. Can PICO validate specific drone hardware like ESCs or flight controllers?

Yes. PICO integrates with barcode scanners to validate part numbers and serials at each step. This ensures, for example:

  • The ESC installed matches the correct firmware version for the drone’s flight controller
  • The battery pack is compatible with the onboard power distribution board
  • Serial numbers for key flight components are logged for downstream traceability


4. What kinds of tools and equipment can PICO integrate with on a drone build line?

PICO supports plug-and-play integrations with tools commonly used in drone assembly, including:

  • Digital torque wrenches for motor mounts and frame screws
  • Multimeters to verify voltage at power rails before final enclosure
  • Vision cameras to inspect for missing standoffs, misaligned sensor boards, or improperly routed antennas
  • Barcode/RFID scanners to confirm component compatibility across variants

All of these can trigger real-time stop conditions if something’s out of spec.


5. Our drone production is still low-volume. Can PICO handle low-volume, high-mix environments?

Yes, PICO is designed to simplify high-mix assembly environments. In fact, small-batch and prototype drone teams are some of the biggest winners:

PICO is built for one-station setups and scales as your volume grows.


6. How long does it take to digitize our first drone assembly station?

Most teams are live in under a week. No custom code, no heavy IT lift.

You can:

  • Create a digital instruction set from your current SOPs
  • Connect your torque tools, scanner, or vision station
  • Start building and error-proofing live units

Gain access to hundreds of solutions from a single platform

Step into the future of factory operations with Pico MES. Start your journey toward a more efficient, error-proof factory floor today.


Start your journey with Pico MES today